In this article, we are going to learn how we can add edmx data model file to .net framework or class library project in visual studio.
What is Edmx?
.edmx is basically an XML file which is generated when we add Entity Framework model. It is Entity Data Model Xml which contains designer (Model) and code file(.cs).
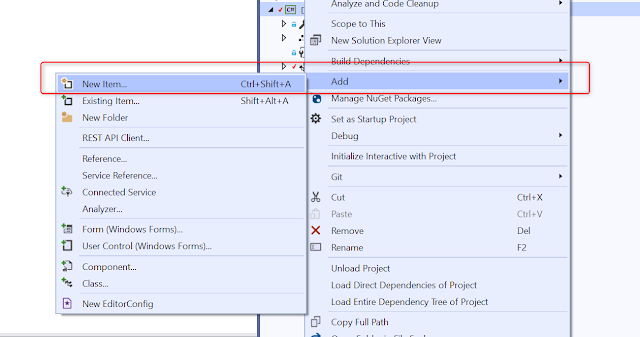
Step 1: Right click on proj and select add new item
Right click on your project and select add > new item option.
Step 2: Select ADO.NET entity data model option
Go to data and select ADO.NET entity data model type, and then give name to your edmx file and click on add.
Step 3: Select model option
Select 'EF designers from database' option from next window, and click on next.
Step 4: Click on new connection option
In next window click on new connection button to establish database connection
Select all required option and then click on test connection button to check your database connection valid or not.
If you are connecting your local pc database than use windows authentication option in authentication dropdown in log on to the server section or select sql server authentication for remote database.
Step 6: Save connection settings to app or web config
After establishing database connection select checkbox save connection string in app.config as option and click on next.
Step 7: Import objects (database tables)
In next window select tables options and check required checkboxes as shown in below screenshot and give model name space name which can be any but should be related to your project or your database name.
Now click on finish to add edmx entity data models to your projects.
Thanks for reading this article, if you found this article useful then share it with your friends and also add reviews in the comment section.


Comments
Post a Comment